

CA-27 #412296
Since 1980
Local team. No pressure. No spam.
You want lush, productive garden beds that fit your sunny yard and busy life. Most Orangevale homeowners picture fresh tomatoes and herbs steps from the kitchen, not soggy soil or warped wood a year later.
Our garden bed installation in Orangevale, CA handles the hard parts for you. We size the beds, pick the right wood, and build them to hold up through hot Sacramento foothills summers.
This page walks you through what happens before, during, and after your beds go in. You will know what to expect every step.
Cedar and redwood hold up best for raised garden beds in Orangevale, CA. Both woods resist rot, insects, and the region’s hot, dry summers. They stay strong for ten or more years without chemical treatment.
We help you pick the right wood for your yard and budget.
Before we lift a single board, we walk your yard and spot the things that can make or break a garden bed. Every yard in Orangevale is different, and a quick site check saves you from soggy roots, stunted plants, and wasted money.
Here is what we check on that first visit:
Clay-heavy soil is the biggest issue we see around town. Water pools, roots rot, and plants look sad by midsummer. A raised bed solves most of that, but only if the base is built for your exact yard.
You walk away from the site visit with a plan. You know the bed count, size, wood type, and where each one goes. There is no guessing and no paying for materials that do not fit your space.
This first step feels simple, but it is where good beds start. Skip it and you end up fixing problems later. We would rather get it right now.
A DIY raised bed sounds simple until you price the lumber, rent the tools, and spend a full weekend in the sun. Most homeowners we meet tried it once and called us the second time around.
Here is how hiring a pro compares to building it yourself:
DIY Build | Professional Install |
Full weekend of work | Finished in a few hours |
You haul wood and soil | We deliver everything |
Tool rentals add up | No rentals needed |
Guesswork on wood choice | Right wood picked for you |
Often lasts 3-5 years | Built to last 10+ years |
Summer heat hits fast in the Citrus Heights and Orangevale area. If your bed is not in by late April, you miss prime planting for tomatoes, peppers, and squash. A weekend project that drags into three weekends costs you a whole season.
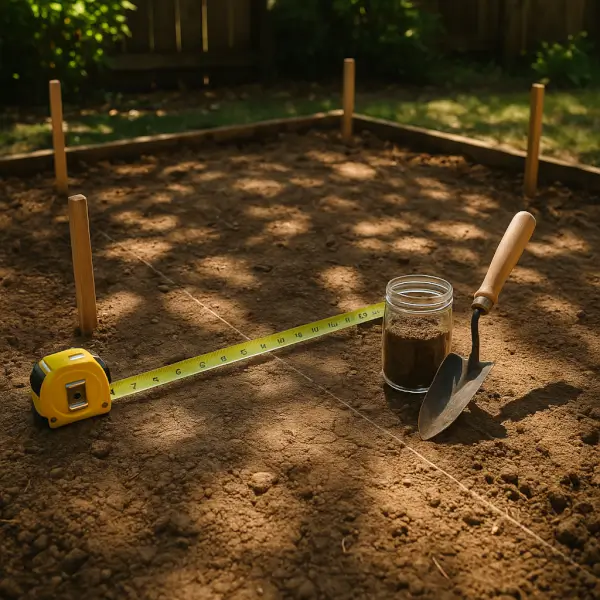
We bring the crew, the tools, and the trained eye. Frames go in level on the first try. Corners are squared. Fasteners are the right length and rust resistant. The liner sits flat. The soil mix is layered for strong roots, not just dumped in.
You also skip the small mistakes that shorten a bed’s life. Untreated pine rots in two summers. Frames without proper anchoring shift when the soil swells. Corners built with drywall screws pop apart. We have seen all of it, and we fix all of it.
The best reason to hire out is time. You get back your weekend, your back stays healthy, and your beds are ready to plant. That is a better trade than saving a few dollars on lumber.
Timing matters more than most homeowners think. A bed installed in late winter is ready to plant the moment the soil warms. Wait until May and you are already behind on tomatoes, peppers, and squash.
Here is the schedule we follow with most Orangevale homeowners:
Orangevale winters are mild, so our crews work through January and February without issue. The ground is soft, the weather is cool, and we move faster. That means lower stress for you and a better price on the build.
Booking early also gives you room to think. You get to pick the wood, the soil mix, and the layout without rushing the decision. Last-minute installs in April and May often mean whatever wood is in stock and whatever time slot is left. That is not how you want to start a garden.
Fall is the other sweet spot. Cool-season crops grow well in Orangevale from October through February. A September install gives you fresh greens through the holidays and a head start on spring.
The worst time to call is late April. Every landscaper in town is booked, and you lose your planting window. Call us in winter and your beds will be ready when the soil warms. For more on seasonal planting windows backed by agricultural research, the data lines up with what we see in local yards every year.
Installation day goes faster than most homeowners expect. You do not need to do anything but point us to a water spigot and let us work. Here is exactly what happens from start to finish.
Most single-bed installs wrap up in three to four hours. Larger multi-bed projects take a day. You are left with a yard that looks finished, not a jobsite.
We also leave you with a short care sheet. It covers watering, first-season planting tips, and how to spot early issues. No guessing once we drive away.
Before the crew leaves, walk the beds with us and run through a few quick checks. A good install holds up for years, but only if every piece was done right on day one. These are the same checks we run ourselves.
Start with the frame. Push down on each corner and along the middle of every board. The frame should not rock, tilt, or leave a gap at the ground. A level frame keeps soil from spilling and wood from warping in the heat.
Next, press your hand into the soil. It should feel loose and dark, not packed tight or muddy. Loose soil means roots can spread and water can move. Muddy soil means the mix is off or the drainage was missed.
Check the liner edges. The weed barrier or cardboard should be fully covered by soil with no edges poking up. Exposed liner breaks down fast in the sun and lets weeds push through.
Run water into the bed and watch it drain. Good beds drain within a few minutes. If water sits for an hour, the base was not prepped right for your yard’s clay soil.
Finally, wiggle the corners and push on the fasteners. Every joint should feel tight with no wobble or creak. Orangevale summers push past 100 degrees, and that heat warps any frame that was not fastened with the right screws and spacing.
If anything feels off, tell us on the walkthrough. We fix it on the spot, not on a return trip. A bed that passes these checks on day one will still be solid ten years from now.
A well-built bed can last a decade or longer, but only if you care for it. The good news is that upkeep takes less than an hour a season. Build these small habits in and your beds will keep feeding your family for years.
Every spring, top off the soil. Winter rain and freeze-thaw cycles push soil down an inch or two. Add fresh topsoil and compost until the bed is full again. Roots need that depth to spread and feed.
Compost is the other spring must. Work two to three inches of fresh compost into the top layer before you plant. This keeps nutrients high, holds moisture in the heat, and stops the soil from packing hard.
Each fall, walk your beds and look at the wood. Run a finger along the boards and check for cracks, soft spots, or dark rot near the ground. Seal small cracks with a food-safe wood sealer. Replace any board that feels spongy before it spreads to the next one.
Watering is where most Orangevale beds get hurt. Hand watering soaks the frame every time. Drip irrigation on a timer puts water at the roots and keeps the wood dry. Dry wood lasts two to three times longer than wood that stays wet.
Rotate your crops each season. Do not plant tomatoes in the same spot two years running. Move heavy feeders to where light feeders grew last year. This stops soil from burning out and keeps pests from settling in.
Cedar and redwood frames in Orangevale regularly hit ten, fifteen, even twenty years when kept dry between waterings during our long dry season. These habits are what get you there.
Garden bed installation in Orangevale typically ranges based on wood choice, bed size, and soil volume. A single four by eight cedar bed with quality soil usually falls in the mid hundreds, while multi-bed projects with redwood, gopher wire, and drip irrigation run higher. We price each project after the site visit so you see exactly what the wood, soil, liner, and labor cost before you commit. No hidden fees show up later on your final invoice.
You should book your garden bed install four to eight weeks in advance, especially if you want beds ready for spring planting. Our calendar fills up fast from February through April as Orangevale homeowners race to beat the summer heat. Booking in November, December, or January locks in your preferred date, gives you time to choose wood and layout without pressure, and ensures your beds are planted before tomato and pepper season starts in earnest.
Do you provide the soil and materials, or do I need to buy them?
We provide all the soil and materials for your garden bed installation, so you do not need to source anything yourself. That includes the cedar or redwood lumber, rust-resistant fasteners, weed barrier or cardboard, gopher wire if needed, and a custom-blended mix of topsoil, compost, and organic matter. Everything is delivered on install day and included in your quoted price. You only need to point us to a water spigot and decide where the beds go.
Yes, we stand behind every garden bed installation with a workmanship warranty covering the frame, fasteners, and structural build. If a corner loosens, a board warps from a build error, or the frame shifts out of level within the warranty window, we come back and fix it at no cost. The wood itself carries its natural lifespan, which is ten or more years for cedar and redwood when cared for properly. Ask us for full warranty details during your walkthrough.
Serving: Orangevale, Fair Oaks, Folsom, Roseville, Rocklin, Granite Bay, Citrus Heights, Rancho Cordova, Elk Grove, Auburn, Lincoln, Fairfield, El Dorado Hills, and Beyond