

CA-27 #412296
Since 1980
Local team. No pressure. No spam.
Dark walkways and unlit garden beds make your yard feel smaller and less safe at night. You want an outdoor space that looks beautiful and welcomes you home after sunset.
Our custom lighting layout design in Orangevale starts with your yard, your goals, and your budget. We map every fixture, cable run, and beam angle before a single light goes in the ground.
On this page, you will see how the full design process works from first walkthrough to final night-time walk. Your plan fits your yard, not a template.
Most low-voltage landscape lighting in Orangevale, CA does not need a permit. Line-voltage systems that tie into your home’s main electrical panel usually do require one. Always check with Sacramento County before starting any outdoor electrical work.
Pulling the right permit protects your home value and your insurance coverage long term.
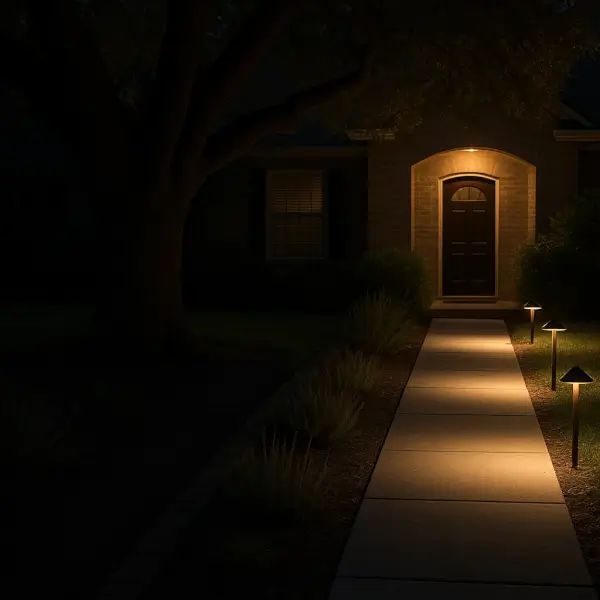
Walk your yard after sunset and you will spot the trouble fast. Dark patches near the front door, a black hole under the oak tree, or a porch light that blinds anyone who walks up. These are the exact issues a custom lighting layout design in Orangevale is built to fix.
Most yards we visit have the same set of problems. The good news is every one of them is solvable once you see the full picture on paper.
Orangevale yards add their own twist. Large mature oaks throw deep shadow zones that swallow light from a single fixture. Wide front yards on streets like Hazel Avenue and Greenback Lane need more than two or three path lights to feel even.
A layout plan walks the whole property first and marks every problem spot before any fixture goes in the ground. You see fixture counts, beam angles, and spacing on paper. That way you are not guessing, and you are not paying twice when the first attempt misses the mark.
The plan also flags what you do not need. Fewer lights in the right places almost always beat more lights in the wrong ones.
Before any fixture goes in the ground, you need to pick the right system type. This choice shapes your daily costs, your safety, and how easy the lights are to adjust later. Most Orangevale yards do best with one clear option, but the right answer depends on your goals.
Here is a quick side-by-side look at the two main system types:
Low-Voltage Systems | Line-Voltage Systems |
Run on 12 volts | Run on 120 volts |
Safer to handle and adjust | Require a licensed electrician |
Lower daily energy use | Stronger, brighter output |
Easy to move or expand | Best for large estate yards |
Great for paths, trees, beds | Suited to commercial-style lots |
Low-voltage is the right pick for most homes. These systems are safer to work around, easier to tweak after install, and cost less to run every night. Modern LED fixtures sip power compared to older halogen bulbs, which means lower utility bills month after month.
Line-voltage has its place too. If you have a very large lot, long driveways, or want flood-style brightness across big open areas, line-voltage delivers that punch. Just plan for higher install costs and stricter permit rules.
Hot Orangevale summers push energy bills up fast, so every watt counts. A low-voltage LED layout keeps your yard glowing without spiking your monthly costs. That long-term savings matters in a climate where the AC already works overtime.
A professional layout plan matches the right system to your yard size, your features, and your goals. We size the transformer, pick fixture wattages, and route cable so nothing gets overloaded. Hiring a landscaper removes the guesswork and helps you avoid costly rework down the road.
Your first consultation sets the tone for the whole project. We come out, walk every corner of your property, and listen to what you want your yard to feel like after dark. This is where good design starts, long before any fixture comes out of a box.
We look at the trees, paths, garden beds, patio areas, and entry points. We also note the spots that feel unsafe or look flat at night. Then we talk through your real goals for the space.
Here is what a typical consultation covers:
This step matters because changes on paper cost nothing. Changes after install cost real money and time. A clear plan also helps you compare quotes fairly if you talk to more than one landscaper.
In the Fair Oaks Boulevard corridor near Orangevale, many homes sit on longer suburban lots. We often add driveway lighting to those consultations so guests can find your home and park safely. Every yard is different, and your plan should match yours.
Once your layout plan is approved, the install moves fast. A good crew works in a set order so nothing gets missed. Here is what a typical install day looks like in your Orangevale yard.
Some Orangevale neighborhoods sit on rocky clay soil that fights back against a standard shovel. Crews bring trenching tools built for that ground so cable goes in clean without tearing up your lawn. Following outdoor wiring safety standards published by organizations like UL Solutions for landscape and outdoor lighting also helps protect your system long term.
Most standard residential installs wrap up in one to three days. Larger yards with driveway lighting or multiple zones may need a fourth day. You get a finished system that matches your plan exactly, with no surprises and no shortcuts.
The job is not done when the last fixture goes in the ground. You need to see the system at work after dark. A proper walkthrough catches small problems before they become bigger ones. We schedule this verification step with every install in Orangevale.
Plan to meet your installer at dusk for the best view. That timing lets you see how each fixture performs as the sky darkens. Walk the full yard together and look at every angle.
Here is what your post-install walkthrough should cover:
Homeowners near Orangevale Community Park often add one more check. They verify that no light spills onto neighboring yards or the park itself. Good neighbors keep their glow on their own property.
Save your layout map in a safe spot. You will need it years later for repairs, plant changes, or new additions. A clear record protects your investment and saves time on every future service call.
If something looks off during the walkthrough, speak up right away. Small aim tweaks and timer fixes are easy while the crew is still on-site.
A lighting system lasts longer when you give it a little care each season. Skipping basic upkeep leads to dark spots, dead bulbs, and water damage inside fixtures. We help Orangevale homeowners build a simple routine that keeps every light working as designed.
Orangevale’s dry summer heat can crack fixture housings and shorten bulb life. That means seasonal checks matter more here than in cooler climates. Climate data from global research groups shows hotter dry seasons keep pushing outdoor equipment harder each year. Your lighting system feels that strain too.
Here is the maintenance checklist we follow for local yards:
Small problems grow fast when they go unchecked. A loose wire connection can short out a whole zone. A clogged lens can hide a great fixture behind a dim glow. Trimming one branch can bring back the full effect of a tree uplight.
We offer yearly maintenance plans for Orangevale customers who want hands-off care. Our crew walks the yard, tests every fixture, cleans every lens, and reports any worn parts. You get a clear summary and a working system year after year.
The cost of a custom lighting layout design in Orangevale depends on yard size, fixture count, and system type. Most residential design plans start in the low hundreds of dollars and credit toward the install. A full low-voltage install with eight to fifteen fixtures typically runs a few thousand dollars, while larger estate yards with driveway lighting and multiple zones cost more. We give you a written estimate after the consultation so there are no surprises before work starts.
Designing and installing a lighting layout usually takes one to three weeks from first call to final walkthrough. The consultation and written plan take a few days, fixture ordering adds another week, and most residential installs wrap up in one to three days on-site. Larger Orangevale yards with driveway lighting or multiple zones may need a fourth install day. We schedule the final night-time aim and test once everything is wired and ready.
Yes, we back every lighting design and installation in Orangevale with a clear warranty. Our workmanship is covered for a set period after install, and most fixtures carry a separate manufacturer warranty that can run five to fifteen years depending on the brand. Transformers and LED bulbs have their own coverage terms. We hand you all paperwork at project close and keep a copy of your layout map on file for future service calls.
Before booking a lighting consultation, have a few key items ready to speed up the process. Think about your top goals such as safety, curb appeal, or entertaining. Note which features you want highlighted, like trees, garden beds, or the front entry. Have a rough budget range in mind and check for any HOA rules in your Orangevale neighborhood. If you have a property survey or site plan, share it. This prep helps us design a layout that fits your yard on the first visit.
Serving: Orangevale, Fair Oaks, Folsom, Roseville, Rocklin, Granite Bay, Citrus Heights, Rancho Cordova, Elk Grove, Auburn, Lincoln, Fairfield, El Dorado Hills, and Beyond