

CA-27 #412296
Since 1980
Local team. No pressure. No spam.
A dark front walkway puts your family and guests at risk every night. Pathway lighting in Orangevale fixes that fast, and it adds real curb appeal to your home. Your walkway should feel safe in July heat and January rain.
You will learn how to pick fixtures, plan smart spacing, and keep lights working long after the crew leaves. We cover styles, install steps, and care tips on this page.
A licensed landscaper brings the right tools and skill to make your yard safe and beautiful for years.
Most low-voltage pathway lighting in Orangevale does not require a permit. High-voltage or hardwired systems may need an electrical permit from Sacramento County. Always ask your landscaper to confirm requirements before work begins.
Check permit status before your install date to avoid delays.
A dark front walkway is more than an eyesore. It puts your family and guests at real risk every night they step outside.
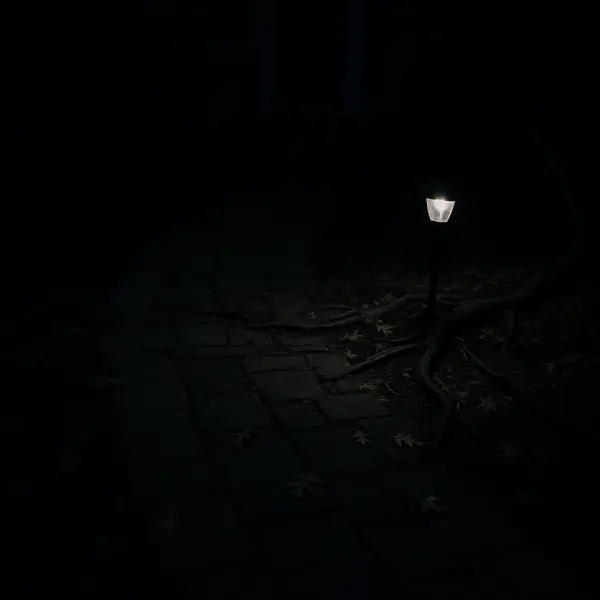
Uneven pavers shift over time. Tree roots push up under the concrete. When the path stays dim, no one sees these hazards until a foot catches and someone falls. We see this trip risk on Orangevale walkways every week.
Poor lighting also hurts the way your home feels from the street. Delivery drivers slow down and squint. Guests pause at the curb, unsure which door belongs to you. A dim front path drags down the look of the whole yard, no matter how nice your plants or paint look in daylight.
Solar lights often add to the problem instead of fixing it. They depend on direct sun all day to hold a charge. Orangevale winters bring cloudy stretches that drain those tiny batteries fast. By 9 p.m. half your path goes dark.
Mature oak and pine trees make this worse. Most Orangevale yards have at least one big shade tree near the front walk. Falling leaves, needles, and pollen coat the solar panels and block the charge. The lights you bought at the hardware store last spring may already be failing.
Mismatched fixtures cause their own problem. When you replace dead lights one at a time, you end up with hot spots near the new bulbs and dark gaps between the old ones. The path looks patchy instead of polished.
The fix is a planned layout with matched fixtures, steady power, and the right spacing for your walkway length. That is where a pro pathway lighting plan pays off.
The right fixtures shape how your walkway looks and works every single night. You have real choices in power source, bulb color, and fixture shape. Each one changes the feel of your front yard.
Start with the power source. Low-voltage wired systems give you steady light no matter the weather. They run on a transformer and shine the same in July heat or January rain. Solar lights cost less up front and work well in open, sunny spots. But heavy oak and pine cover across many Orangevale lots blocks the panels from charging.
Next, think about bulb type and color:
Fixture style matters just as much as the light itself. Here is how the three main shapes compare:
Fixture Style | Best Fit |
Bollard | Tall, formal paths and craftsman homes |
Mushroom | Soft downward glow on garden walkways |
Stake | Flexible spacing along curved or short paths |
Homes in The Villages at Orangevale lean craftsman in style. Warm bronze or black bollard fixtures pair beautifully with those wood and stone fronts. If your home has a more modern look, cool white stake lights along clean concrete pavers feel right.
We help you sort through these picks based on your yard, your trees, and your budget. The goal is a path that looks planned, not pieced together.
A little prep work on your end makes install day go faster and smoother. The crew can focus on placing lights instead of moving your stuff around. You also avoid surprise costs from hitting buried irrigation lines.
Here is what to handle in the days before your appointment:
Many Orangevale lots have drip irrigation running right next to the front walkway. The tubing often sits only two or three inches under the mulch. A trenching blade can slice it in a single pass if no one knows it is there.
Walk your yard the day before and lift any mulch where you remember the irrigation crew laying line. Run the system for a minute and watch for wet spots that show emitter locations. Flag those spots so the installer can route around them.
If you have automatic sprinklers, turn off the controller the morning of the install. This keeps the crew dry while they trench and wire the path. You can switch it back on once the lights are tested and the trenches are filled.
Good prep saves you time, money, and repair calls later.
Install day moves faster than most homeowners expect. You get a clean, lit walkway by sunset with no mess left behind. Here is how a professional crew works through your yard step by step.
Orangevale soil turns to hard clay during long summer stretches. A pro crew brings sharp trenching tools and root-safe techniques to cut clean lines without harming oak or pine roots. They also know how to work around drip irrigation and existing hardscape.
Most pathway lighting installs in Orangevale wrap up in four to six hours. You should plan to be home for the start so you can sign off on placement. After that, you can go about your day while the crew works.
The result is a finished system that lights every step from driveway to door.
A finished install looks great on day one. The real test comes a few nights and a few weeks later. Walking your path and checking each fixture helps you catch small issues before they grow into bigger ones.
Start with a simple nighttime walk down your front path. Look for even spacing of light along the walkway. Dark gaps between fixtures often mean a bulb sits too low or points the wrong way. Bright hot spots can mean a fixture sits too high or too close to its neighbor.
Next, check the transformer timer over a few evenings:
Touch each fixture gently to make sure it stays firm in the soil. Stakes can shift after the first deep watering or rain. A wobbly fixture often points the beam off the path and wastes light on the lawn.
Look closely at each bulb while the system runs. Every light should shine at the same brightness with no flickering. A dim or flickering bulb usually points to a loose connection or a weak LED that needs swapping.
Walk the cable path one more time. The low-voltage wire should stay buried under soil or mulch the whole way. After the first Orangevale rainstorm, check spots where runoff crosses the path. Exposed cable invites damage from mowers, foot traffic, and curious pets. Push any visible wire back under the soil and pack it down firmly.
Pathway lights need a little care each year to stay bright. A short maintenance routine adds years to your fixtures and saves you money on early replacements. Most of it takes less than an hour.
Spring is the best time to wipe down each fixture lens. Pollen, dust, and hard water spots from sprinklers dim the light fast. A soft cloth and mild soap clear the glass and bring back full brightness.
Follow this simple seasonal checklist to keep your system working right:
Sierra del Oro homes near Orangevale get heavy leaf fall each autumn. Wet leaves pile up around low fixtures and trap moisture against wiring. That moisture leads to corrosion at the connectors and shortens bulb life. Rake leaves away from your light line every few weeks during fall.
Group bulb replacement matters more than most homeowners think. When one bulb dies, the others are usually close behind. Swapping them all at once keeps the path looking even and saves return trips.
A yearly pro inspection catches the small stuff before it turns into a full system failure. We check transformer load, buried cable, and stake alignment in one visit. Catching a loose connector early beats digging up the whole run later. With steady care, your pathway lights will look sharp season after season.
Pathway lighting installation in Orangevale typically depends on walkway length, fixture count, and material quality. Most full systems with a transformer, low-voltage cable, and eight to twelve LED fixtures fall into a mid-range price band for residential yards. Premium bronze or cast brass fixtures cost more than aluminum. Add-ons like smart timers, dimmers, or extra zones raise the total. Your landscaper should give you a written quote after walking the path with you so you see exactly what each line item covers.
A pathway lighting install usually takes four to six hours from start to finish for a standard Orangevale front yard. The crew walks the layout with you, trenches the cable run, sets each fixture at measured spacing, mounts the transformer near an outdoor outlet, and tests every bulb at dusk. Larger yards with curved or extended paths can take a full day. You only need to be home at the start to approve placement and again at the end for the walk-through.
Yes, we offer a warranty on pathway lighting work that covers both labor and the fixtures we install. Workmanship coverage protects the trenching, wiring, and connections we complete on your property. Fixture and bulb coverage follows the manufacturer terms, which often run three to five years on quality LED systems and transformers. If a light fails inside the warranty window, we return, diagnose the cause, and repair or replace the part. Ask for the written warranty before your install date so you know the exact terms.
The best time of year to book pathway lighting in Orangevale is early fall or late winter, when soil is workable and crew schedules open up. Spring fills fast with full yard projects, and midsummer clay turns rock hard, which slows trenching. Booking in September or February also lets your new lights shine through the long, dark evenings of fall and winter when you need them most. Reach out two to three weeks before your preferred install date to lock in a slot.
Serving: Orangevale, Fair Oaks, Folsom, Roseville, Rocklin, Granite Bay, Citrus Heights, Rancho Cordova, Elk Grove, Auburn, Lincoln, Fairfield, El Dorado Hills, and Beyond